Building a home studio is a common dream for any music creator or audio enthusiast. Today we will break down two typical setups that homeowners will likely have for vocal tracking, all while working within a $1000 budget.
Part I: Layout and Acoustic Treatment
The two scenarios we will analyze are:
- A room that is dedicated to audio tracking
- A room that is also being used as a bedroom
Both hypothetical rooms have the same dimensions of 10’x 12’ x 8’. The first thing we must consider are the room modes that come with this size, the main ones being 47.1 Hz, 56.5 Hz, and 73.5 Hz. To calculate other room modes, you can use this online room calculator to generate your potential room modes:
Layout & Orientation
Before we begin treating the room to correct these modes, we must first consider the layout and orientation of both rooms. For the dedicated audio recording space, the desk should be placed in the center of the longer wall, with the vocal booth on the set up in one of the corners of the opposing long wall. This placement will prevent bass buildup as the booth acts as a bass trap.
Moving onto the bedroom layout, a similar placement for the desk would be ideal, however, placing it against the shorter wall could also be an option. You should avoid placing the engineer’s desk in a corner or opposite a window, as that won’t help to prevent reflections caused by bass build up. Since the bedroom studio is not a designated audio space, it will not feature a vocal booth.
Acoustic Treatment
Now that we have our essential layout, we can move on to acoustic treatment. As both studios are home setups, and since we have a small budget, major structural changes will not be an option. However, small walls or gobos can be used in the designated audio room setup in order to create the vocal booth. Ideally, the vocal booth should have minimal parallel surfaces to any wall, meaning a hexagonal or pentagonal shape is preferred.
With a permanent wall, a small window for the vocal booth would also be ideal to place on one of the angled walls, to prevent the performer from being completely isolated. Furthermore, the designated room should feature diffusers and absorption panels opposite the desk and inside the vocal booth to dampen the room and decrease reflections.
Bass traps within the corners of the control room and the vocal booth will also be necessary to help eliminate the aforementioned room modes, as they are mostly low frequency. Lastly, the audio room layout should also have a pop filter on standby to further aid the recording process.
Continuing on to the bedroom studio, the same bass traps, absorption panels, and diffusers should also be placed along the walls. If having bass traps in all corners is not possible, a good alternative is to place the bed in one of the corners. At the very least, 2 absorption panels and 1 diffuser should be placed opposite the speakers. As the bedroom layout does not have a designated vocal booth, a vocal shield, as well a pop filter, will also be necessary.
Part II: Gear and Accessories
Following up from the acoustic treatment, we need to consider the gear that will be used in each studio. The following is the gear that will be the same for both layouts: the microphone, mic stand, cables, audio interface, and speakers.
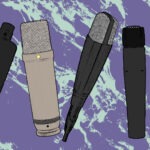
Microphones
Both layouts require at least one microphone to begin with. Some good starting options for vocal mics include the SM58 and the Audio Technica AT-2020. While both mics come with a mount or clip, we will still require a mic stand, preferably with a boom arm, to allow for more maneuverability.
Next up, we will need 10′-25′ XLR cables to hook up the mics to the audio interface, some ¼” or ¼” XLR cables for the speakers, and a USB, Firewire or Thunderbolt cable to connect the audio interface to the computer. These variations between the speaker and audio interface connections are dependant on the type and brand of interface that you purchase.
Tip: make sure that you own the proper connections required for your gear.
Monitor
Both studio setups should have reliable but affordable studio monitors such as Fostex PM0.3H and Tannoy 402. Both of these monitors have a good value for their price.
Audio Interface
While many options exist, the Focusrite Scarlett 2i2 is an excellent beginner option for recording vocals and keys, as they work with two inputs at an entry level and respect our $1000 budget.
Part III: Dedicated Audio Tracking Room
Speaker Stands
First, the speaker stands for the designated space should be standalone towers with both foam padding and shock resistance. As space is not a concern, these stands will ensure the most decoupling (i.e., separation) possible between the speakers and any surface.
Desk
The desk should be quite large to allow for expansion later on or possibly to allow gear racks to be built in. It should also include a comfortable chair as this workspace may involve long hours of sitting.
Flooring
Adding a rug or carpet would allow for additional absorption of reflections and would further dampen the room.
Part IV: Bedroom Studio Setup
Speaker Stands
Unlike the designated space, the bedroom studio may not have the room to allow for speaker stands and, as such, will need foam padding to be placed under the desk speakers to help absorb the vibrations and decouple the speakers from the desk, such the Primeacoustic IsoWedge.
Desk
In a bedroom studio, considering the size, a small desk will be needed with just enough real estate to allocate space for the computer, speakers, and audio interface.
Seating
As for seating in the bedroom studio, a simple office chair can be used or even the bed itself, ultimately depending on the room’s layout. The final piece to examine is flooring in the bedroom space. A rug or carpeted floor would do wonders to treat the space without any major modifications.
Part V: Budgeting & Getting the Materials
By far the largest portion of the budget for both setups will be allocated to purchasing gear if speakers are on the list. This can be brought down considerably, however, if the substituted with headphones, leaving far more room budget for acoustic treatment, especially for the vocal booth.
If, for both scenarios, we opted for used gear, headphones rather than speakers, and as much DIY as possible, the budget breakdown should roughly be as follows:
| Item | Cost |
|---|---|
| Headphones, audio interface, and cabling | $300 |
| Microphone and boom stand | $200 |
| Desk seating and flooring | $100 |
| Vocal booth dividers, acoustic foam, and bass traps | $400 |
| Total | $1,000 |
Market solutions are plentiful, and there is an abundance of options for used gear and sale-priced acoustic treatment options. While market items may be more visually appealing and reliable, they can increase the cost of building a studio substantially. However, using DIY methods will lower the budget immensely and allow for far more room treatment.
Part VI: Do It Yourself
To begin, building gobos and bass traps from scratch is not overly difficult and can save you a lot of money. Using a mix of 2″x4″ planks, burlap, and insolation can create very strong dividers and corner traps at a very small cost. Another method to reduce reflections is placing a mattress or a couch against a wall. The absorptive material is quite handy for soaking up reflections.
Taking the Build Into Your Own Hands
While both scenarios have variations in their acoustic, spacial, and gear requirements, both are capable of holding a professional audio studio complete with room treatment and all necessary gear for under $1000. When building your very own studio, it is well worth looking on used gear sites such as Kijiji, Sweetwater, Amazon, eBay, or going to your local music and hardware stores.
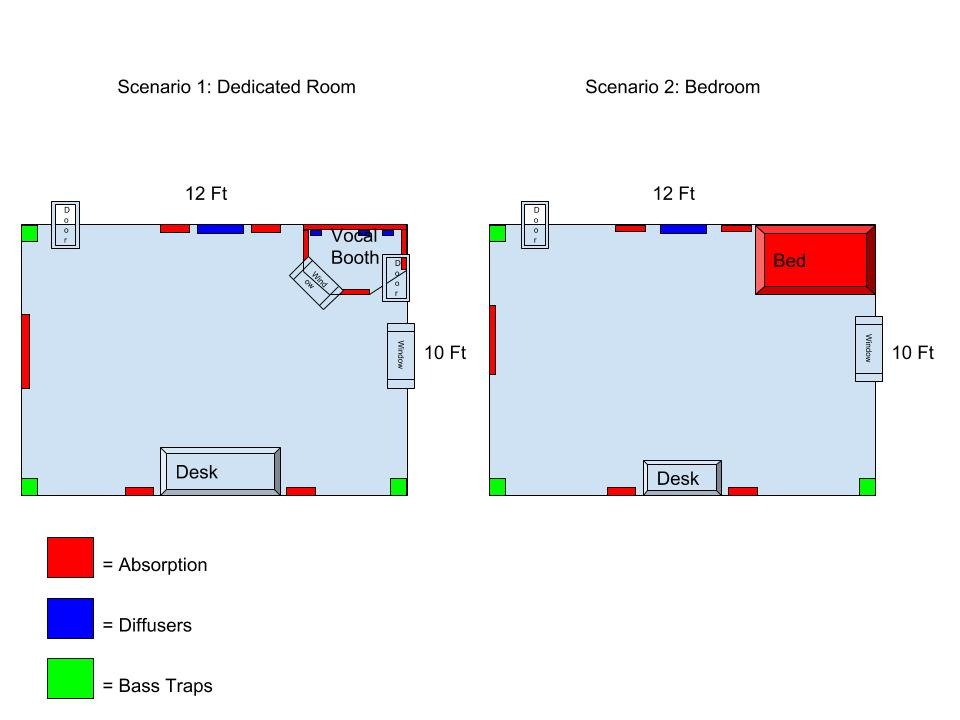
Illustration by Yihong Guo