Creating a unique visual brand for yourself in the music industry helps set you apart from the crowd. But, equally important is your sonic brand. The sounds you develop and use in your music will play a key role in shaping you as an artist. Let’s look at how I developed my sound palette for “Braindeath”.
Step 1: Free experimentation
Allow yourself some time to experiment and try different combinations of waveforms and effects. Depending on the synthesizer, you can combine multiple waveforms, control the number of voices used, and add several effects that modify the sound such as detune and noise.
You can also run the signal of these waveforms through various filters that allow further control over the tonal quality of the sound. The possibilities are endless. If you’re serious about building a unique sound palette that helps you create outstanding tracks, a sizeable time investment is required.
With Braindeath, I spent a few hours tweaking knobs and designing 4-5 synth patches that I could work with. Since the first thing I started working on was the drop, I was aiming for sounds that could stand on their own and hold their position in the frequency range of the track. This meant that a synth patch playing during the drop had to have strong, audible information from the low-mid to the high-mid frequency range (typically 200 Hz to 900 Hz).
I also created a few patches to play at higher notes in order to have variation in the tone of the drop and fill some of the higher frequency range (1000 Hz to 5000 Hz). This resulted in a thick, well-rounded sound with enough information in each frequency band to achieve a full sounding mix.
Step 2: Save, print, and commit
Throughout your career as a producer, it’s important to build a large library of sounds that includes samples, synth patches, and audio material. Your sound palette will consist of hundreds of sounds and ideas that you’ve amassed from all the projects you’ve worked on. Save every version of every synth patch you create. I tend to save patches separately even if I make small modifications in the sound. When I decide on a patch and I’m happy with the sound, I bounce the MIDI note to audio right away. This way, I have a permanent, unique audio file that I don’t run the risk of losing accidentally. In addition to that, this technique teaches you to commit to the sound you created and prevents you from endlessly going back and tweaking it.
When working on “Braindeath”, I spent a few hours designing synth patches and saving them every step of the way. I was able to come up with a lot of material, some of which I didn’t necessarily use for that particular track. However, I knew that saving all my work would help contribute to my library of sounds for my next project.
Beyond being a safety measure and a way to commit to sounds, promptly bouncing patches to audio opened up a whole new realm of sound design possibilities while working on “Braindeath”. This technique is called resampling.
Step 3: Enter resampling
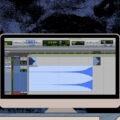
Common in bass and electronic music, resampling is the act of creating a patch in a synthesizer, bouncing the audio, and then re-importing the audio file back into your session or sampler.
Most producers would argue that resampling is 90% of music production. It is a very simple technique to apply and doesn’t require any special tools, but holds the potential for endless sound-bending. Once your bounced audio is in the session, you’re no longer working with a synthesizer, so you can push your sound design imagination further than ever.
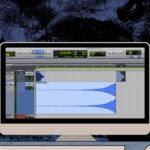
Through the use of plugin effects like EQ, compression, distortion, saturation, flanging, and delay, you can shape your sound into something never heard before. Add automation of certain parameters and pitching/time-stretching to your audio, and you’ll be able to change the texture of your sounds completely.
My track “Braindeath” features several of these methods, and resampling accounts for the majority of how the drop was designed. After designing the patches in a synthesizer, I resampled the audio and ran most of it through guitar amp simulators, distortion, saturation, and dimension expanders to increase the scope of the sound. This helped me achieve a jarring, in-your-face impact for the drop that quickly catches the listeners’ attention. I time-stretched a lot of the audio to create a rich, robust tone, and sliced and rearranged parts of the audio to create a coarse granular effect.
Breakdown of sounds used
Hell Horns (from 0:00 to approximately 0:50 seconds in)
The “Hell Horns” are a square wave played in a low bass note, drowned in a very large hall reverb, and filtered at the beginning so most of the high frequency information is inaudible. This sound sets the entire tone of the track. The deep, droning quality of the sound combined with the portamento between 2 notes (G# and F) creates an eerie, suspenseful atmosphere and helps foreshadow what’s coming next. As the intro of the track moves forward, the cutoff frequency of the filter is automated to slowly increase, revealing the grittiness of the higher register.
Main Motif (from 0:00 to 0:43, and 1:47 to 2:08)
The “Main Motif” is a combination of sawtooth and square waves playing 8 detuned voices each, with distortion and bit crusher to add bite, and delay to expand the scope. This is the main rhythmic component of the track. The pattern this sound plays sets the pace and drives the momentum of the track. It also helps guide listeners (and DJs playing the track) by giving them a cue for the tempo and time signature.
Drop Synths (from 1:05 to 1:46, and 3:12 to 3:55)
This is the most essential part of “Braindeath”, and these sounds create the main theme of the track.
The drop is the most memorable part when played live on venue speakers. Heavily distorted combinations of saw and sine waves are processed in different ways to create variation; comb filtering, saturation, compression to control tone; multiple guitar amp simulators to add richness and grit, stereo imaging and mono-izing to vary the scope of the mix, time-stretching audio to create a grinding/screeching effect; and LFO application on filters to create momentum in the sound.
Perfecting your sonic brand takes time
Your sonic brand is just as important as your aesthetic brand. There are many ways to hone your craft and build your sound palette, from creating and saving synthesizer patches to processing audio files with unique effects.
Throughout your years as a music producer utilizing these methods, you’ll eventually find yourself with a library of hundreds of sounds.
Step by step, you can use combinations of these sounds to create sonically well-rounded tracks that will help define your style as an artist.
Polykrome is a Montreal-based producer and DJ, and a graduate of Recording Arts Canada. You can read his tips on producing compelling electronic music here.