There are many ways to create transitions between sections in a song. Regular reverb may be the most widely used, however another easy way to create these transitions is to implement a long reverse reverb. In the example below, we’ve created one using a crash sample, a reverb with a long decay, and Pro Tools REVERSE effect in the AudioSuite.
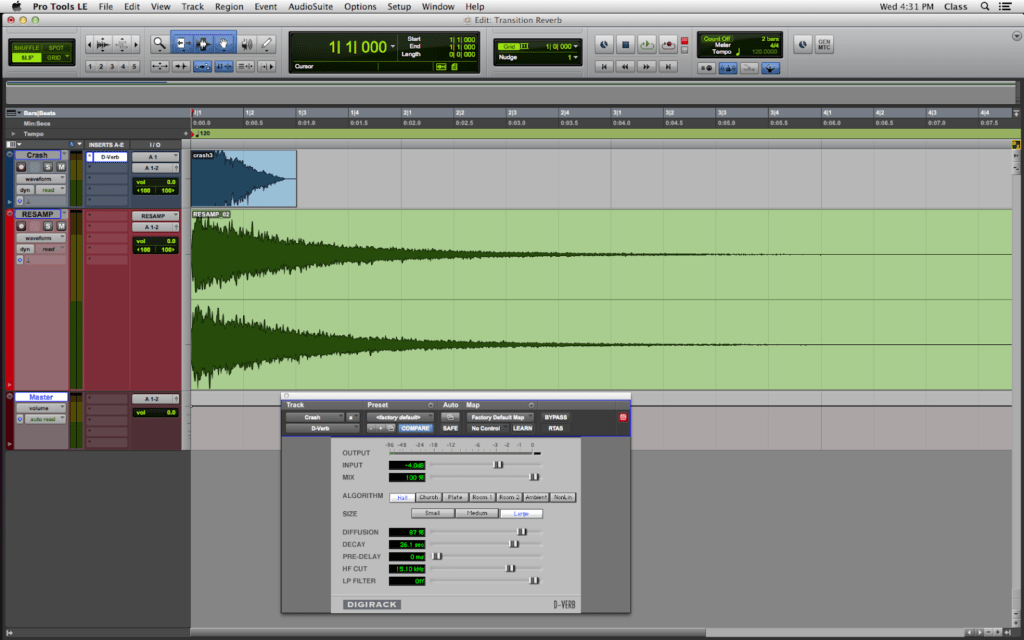
First, you need to create a ‘Resampling’ audio track, (below in red) which you’ll record the reverb effect to. Insert the reverb of your choice that can accommodate a long decay time. Here we’ve chosen 26.1 seconds, but choose whatever length fits for your desired tempo and effect.

Next, you’ll need to create a BUS to SEND the signal to the RESAMP track. Make sure you turn the send fader up to unity (0 dB).
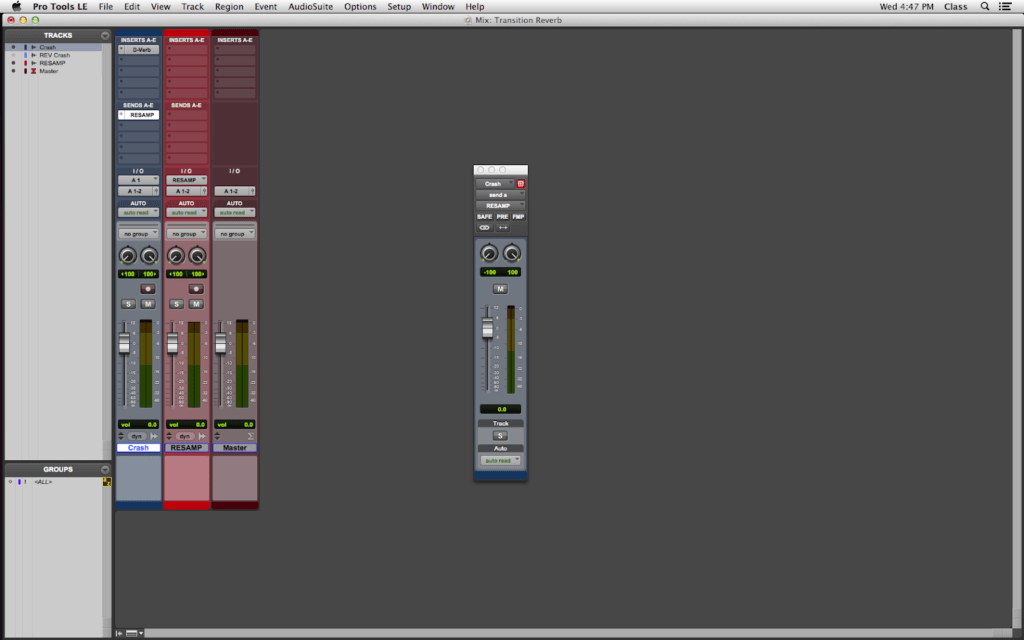
RECORD ENABLE the RESAMP track and record (Shortcut: Numpad 3) the effect.
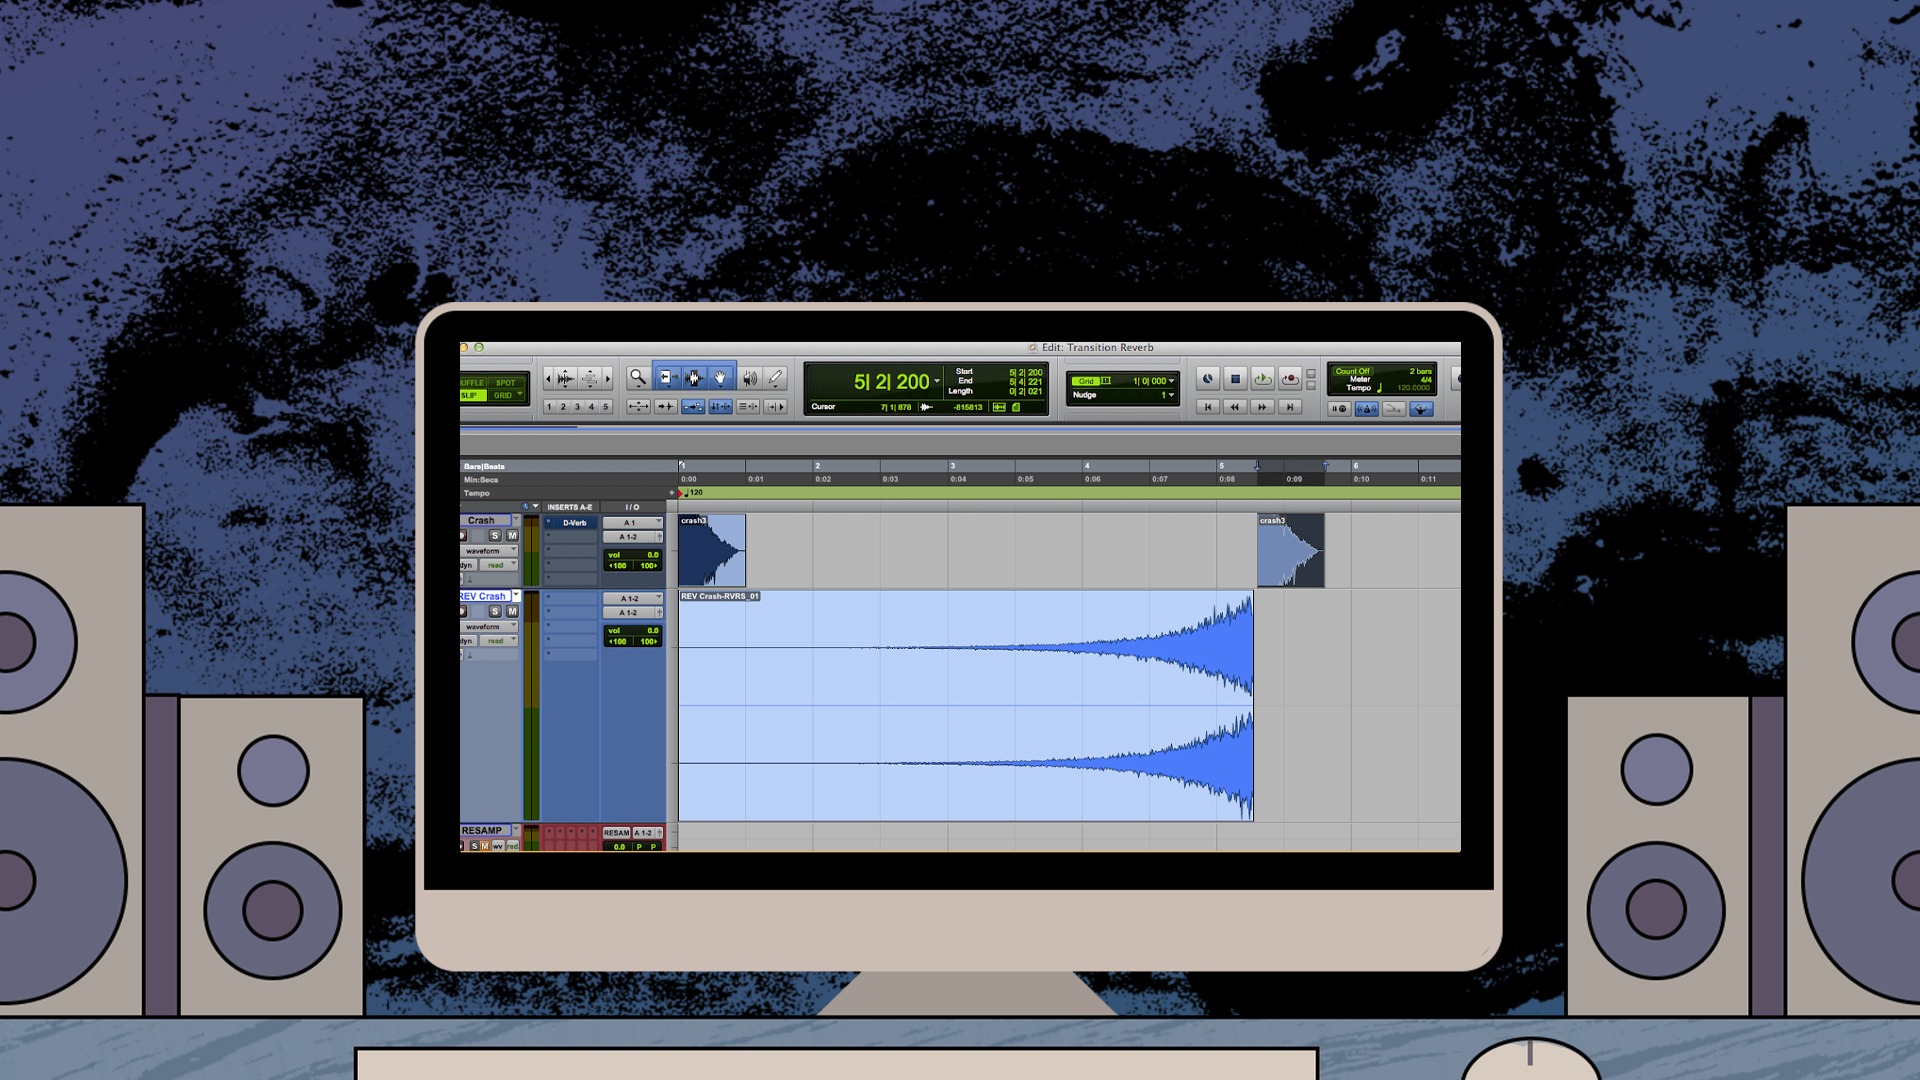
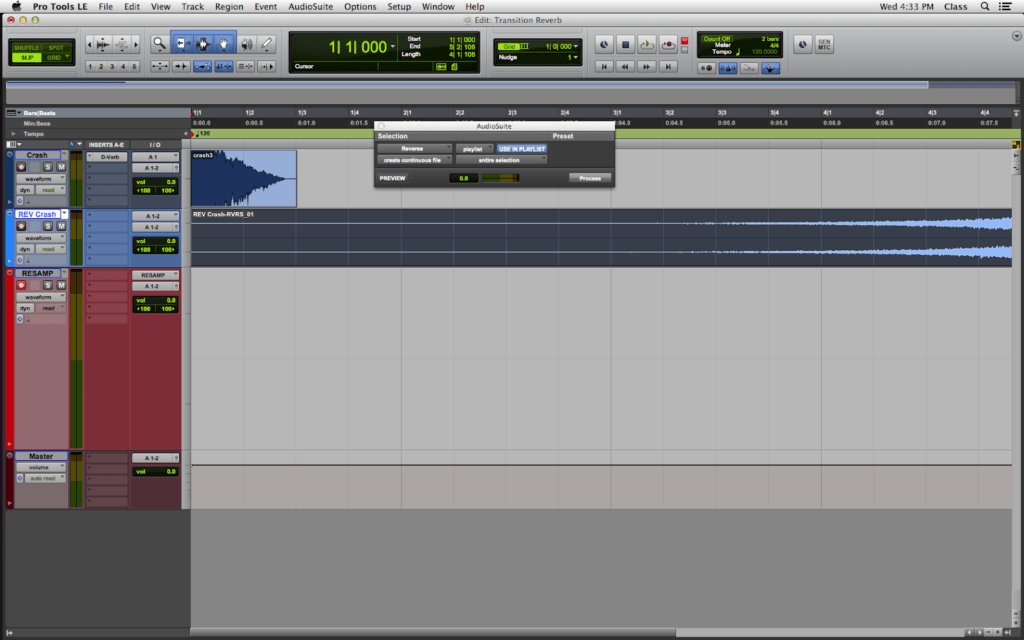
Create a new track to put your newly recorded audio (we’ve labeled the one below ‘REV Crash,’ in light blue). Next, select the audio clip, and go to AudioSuite > Other > Reverse.
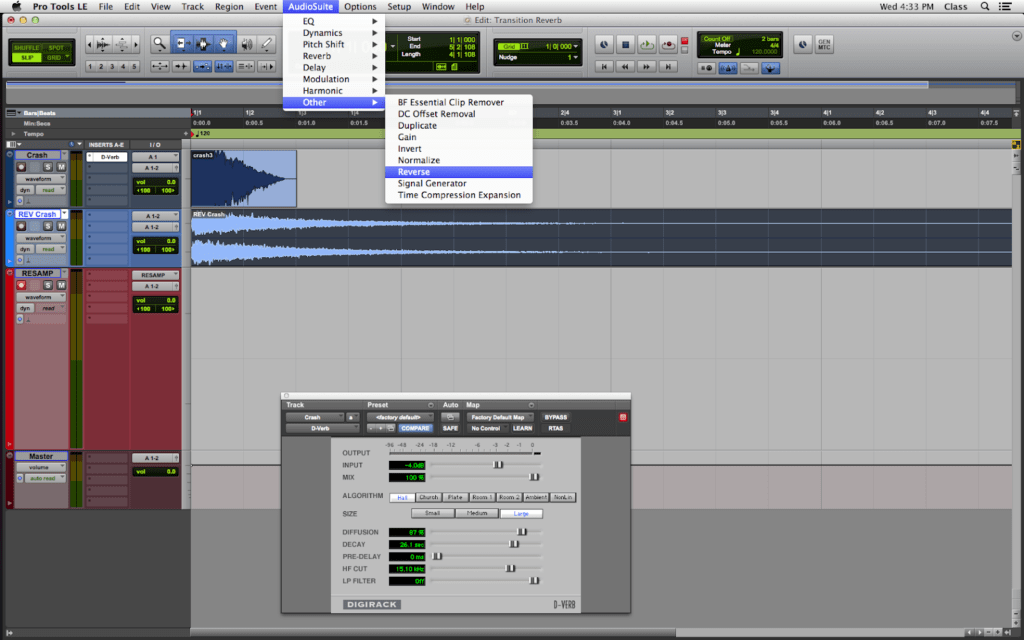
When the AudioSuite box appears, you can PREVIEW (bottom left of box) or PROCESS (bottom right).
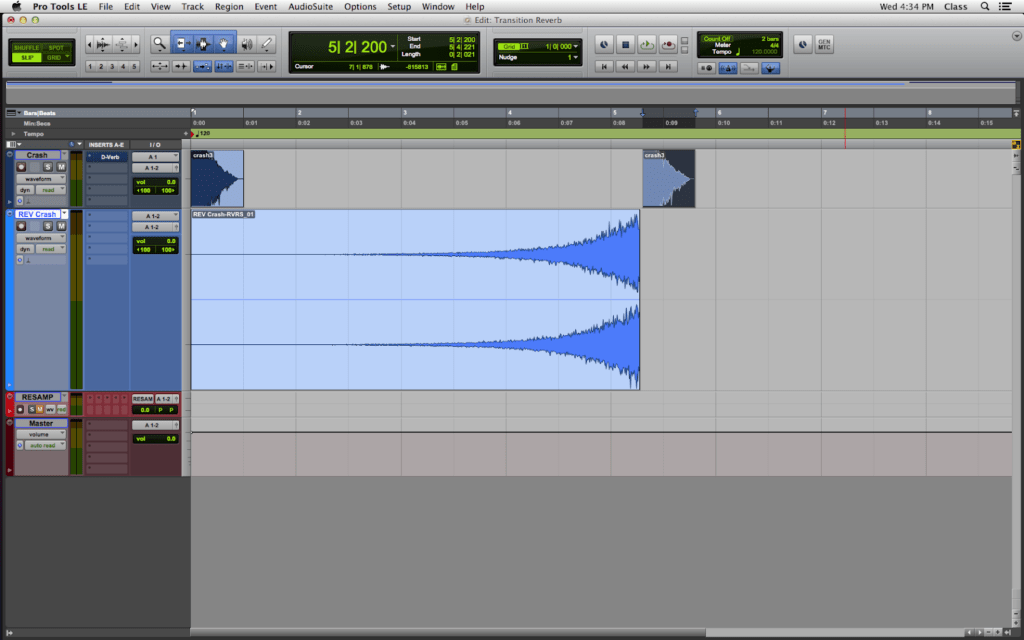
Now you’ve got your very own riser, uplifter, or transition effect!
This is a very common way to create transitions in pop music, EDM, and many other genres. You can try out the same method on a clap, kick, or even a tonal instrument like a piano.
If you have your own ways of creating transitions or similar effects in songs, feel free to submit them to us and let us see your sound design skills!
Looking to expand your sound design skills? Sign up for our newsletter and follow our socials to stay up to date on all the workshops and events RAC hosts regularly.
lllustration by Yihong Guo